Frequently Asked Questions
Punch Needle FAQ
How Does Punch Needle Rug Hooking Work?
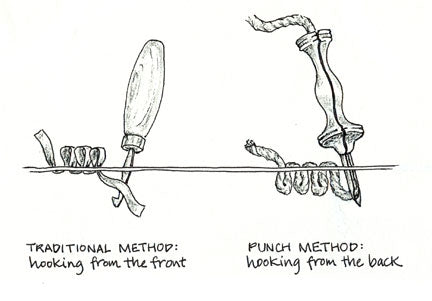
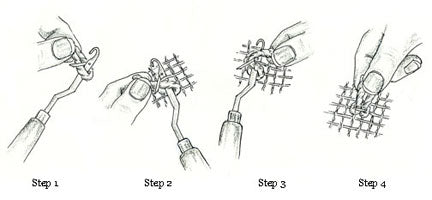
The Oxford Punch Needle forms a continuous loop stitch. Every time you push The Oxford Punch Needle down, it pushes down a long end of yarn. When you bring The Oxford Punch Needle back up, it folds this end into a loop. There are no knots used. The tightness of all the loops packed together keeps it from unraveling. You work from the back side of the rug, so as a novice keep turning over your work to check that your loops are all the same length on the front side of your work.
There are no knots in hooked rugs? Why don ’t they pull out?
Hooked rugs have so many loops packed in tightly together that the tension keeps the loops from pulling out. Also, the small holes in the rug backing grip the loops and help to keep them in place. In addition, when you ’re punching, loops tend to punch through other loops. This helps to hold the rug together. The only thing that unravels these rugs seems to be puppies that chew them, or cats that knead them with their claws. Beater bars on vacuum cleaners can also be dangerous.
How do I know what needle size to use?
To determine the Oxford Punch Needle size that ’s right for you there are two things to consider:
1. What width needle do you want?
The needle width will determine what materials you use in your punch. Choose from two widths: regular point or fine point.
Our regular point needle can be used with heavy 3-ply rug yarn and bulky weight knitting yarn. You can also double, triple, and quadruple finer yarns and thread them together through the punch needle at the same time. ¼” wide strips of fabric also work beautifully in the regular needle. (1/4” wide strips are the same as 8/32” strips thus, these are known as #8 cut in the rug hooking world).
Our fine point needle can be used with worsted weight, sock weight, baby weight, sport weight, tapestry, and needlepoint yarns. Narrow strips of fabric can also be used. We suggest 3/32” wide strips (known as #3 cut in the rug hooking world).
2. How tall do you want your loops to be?
The length of the punch needle determines the length of the loop that is made:
- For ½” loops – choose a #8 Oxford Punch Needle
- For 3/8” loops – choose a #9 Oxford Punch Needle
- For 1/4” loops – choose a #10 Oxford Punch Needle
- For 3/16” loops — choose a #13 Oxford Punch Needle (available in fine point only)
- For 1/8” loops — choose a #14 Oxford Punch Needle (available in fine point only)
Now pick your punch needle. Choose the needle width and loop height that you need. Here are the sizes we offer:
- #8 (1/2" loop) regular point
- #8 (1/2" loop) fine point
- #9 (3/8" loop) regular point
- #9 (3/8" loop) fine point
- #10 (1/4" loop) regular point
- #10 (1/4" loop) fine point
- #13 (3/16" loop) — available in fine only
- #14 (1/8" loop) — available in fine only
Don’t forget to explore the possibilities:
- Use several different needle sizes in the same rug to add depth and dimension to your work. For example, make a sheep that is higher than the background!
- Use regular and fine yarns in the same rug. For example, if you ’re hooking a face using a #8 regular needle with bulky yarn, use a #8 fine needle with a thinner yarn for details such as eyelashes, and other fine facial features. This way, you can use thick and thin yarns together and the loops will all be the same height.

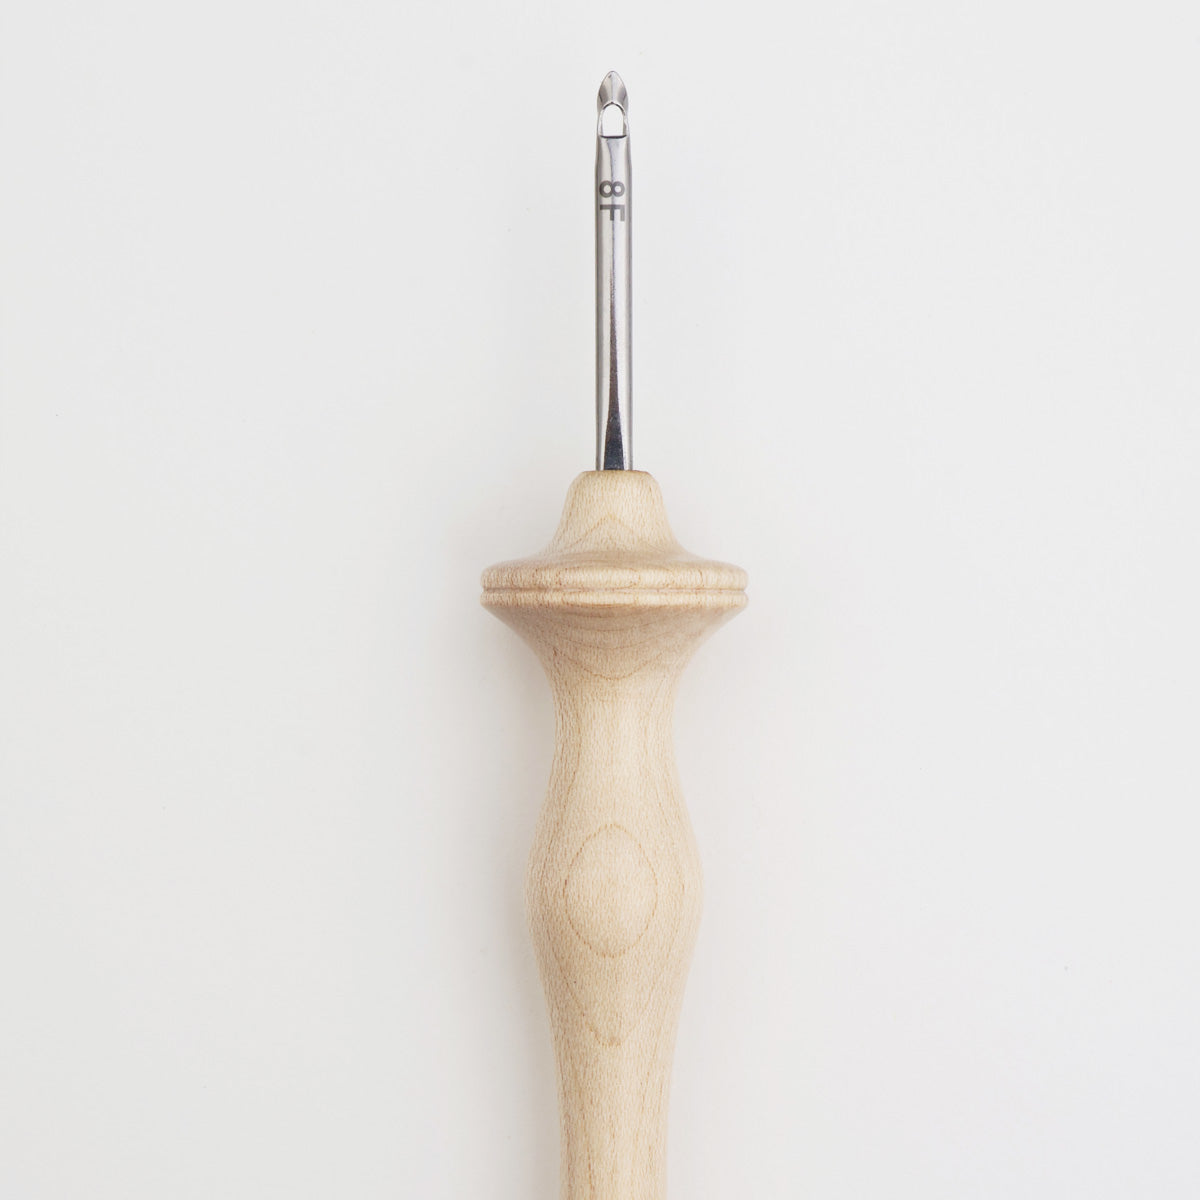
Regular Point Needle (left) and Fine Point Needle (right)
If I was only going to buy one punch needle, what size should I get?
First, you need to determine what look you want, and what materials you want to use:
- If you like the look of primitive traditional hooked rugs, get the #10 regular and use ¼” wide strips of wool fabric.
- If you want to make rugs using yarn, we suggest the #9 regular.
- If you would like to combine ¼” wide strips of fabric and yarn in the same rug, use the #10 regular.
- Want to do finer, more delicate work? Try the #14 Fine Point Oxford Punch Needle.
Can you please explain your crazy punch needle size numbering system?
Crazy isn ’t it? Maybe this will help to clear it up: When I first designed my punch needle, I based my numbers on my favorite punch needle, The Craftsman ’s Punch Needle , which I had used for many years. This is an adjustable tool with ten different settings so you can use it to punch ten different loop heights ranging from ¼” to ¾.” I chose the settings that I used the most, and decided to make my punch needles in those sizes (see illustration below). In addition to the #8, #9, and #10 settings found on The Craftsman ’s Punch Needle, I also make two shorter needles, a #13, and a #14.

About the #14 and #13 Fine (nicknamed “The Mini” and "The Mini with Heels”)
The #14 forms beautiful short, compact 1/8” loops that look similar to needlepoint. It makes beautiful rugs and is also great for small items such as coasters, holiday ornaments, glasses cases, etc. Like all of our needles with fine points, it works well with worsted, sport, sock, and baby weight yarns. Try tapestry or needlepoint yarns in it as well or #3 cut strips of fabric.
The #13 creates loops that are 3/16” tall. Because it makes loops that are just a little bit taller than the #14 (“The Mini”) it was called "The Mini With Heels”. Use it in combination with “The Mini” in places where you want really crisp, clear definition such as lettering. Not only will it make your letters look sharp and easy to read, it ’s a nice addition for outlines and borders as well.

This “Bee Mat” was punched using a #14 ( “The Mini”), but the lettering and border were done with the #13 ( “The Mini With Heels”).
Note how crisp and clear the lettering looks when it is slightly higher than the rest of the punching.
How do I know what punch needle size I have? There is no number on my punch!
There is a laser engraved number on the bottom of the metal point (the side opposite the slot).

If you have an older Oxford Punch Needle: Look at the needle with the metal point facing you and you will see the number stamped on the handle. You can go over it with a pen to make it show up better or write your number with a Sharpee® pen somewhere else on the tool if you want to.

Older Oxford Punch Needle with size stamped on the handle.
Does my punch needle ever need to be sharpened?
No, they just get better and smoother with age. The only time you might run across a problem is if you drop it on a cement floor and get a “burr” on your needle. If this happens, mail it back to us and we will replace the needle for you at no charge. You can also try removing a burr by filing it carefully with a metal nail file.
My stitches keep pulling out! What am I doing wrong?
- Make sure that you always punch your Oxford Punch Needle ALL THE WAY DOWN as far as it will go into the rug backing.
- When you move forward to punch your next loop DON ’T LIFT YOUR NEEDLE UP TOO HIGH! If you do, that will pull your loops right out! Instead of lifting your needle up, drag it along the surface of the monk ’s cloth.
- Remember that your yarn needs to be able to flow freely through the Oxford Punch Needle at all times! Check for the following problems: Do you have a knot in your yarn? Is your yarn getting caught on your frame, under your arm or hand? Is your yarn tangled? Try putting your ball of yarn in a coffee can to keep it from rolling all over the floor.
My loops are all uneven heights, what am I doing wrong?
Make sure that you follow steps 1-3 above. If you do these things and your loops are still uneven try tightening your monk ’s cloth on the frame. Tighten it a lot! Loose monk ’s cloth can cause uneven loops. Your monk ’s cloth should be as tight as a drum! We make every effort to manufacture the best punch needles possible but regret that every once in a while our Oxford Punch Needles do break. It is highly unlikely, but there is a slight chance that your needle has come unglued – that the metal needle has slipped in the wooden handle. If this happens to you we apologize and hope that you will send it back to us for an immediate replacement or for your money back. We are proud of our tools and offer a lifetime guarantee, no matter how many rugs you ’ve made, or how many “miles ’ you ’ve put on your punch needle.
When I ’m punching with strips my loops are all twisted. How do I fix this?
When using strips in the punch the loops can come out like "crooked teeth!” When pulling loops with a traditional rug hook a precise rug hooker can keep loops from twisting and make them line up perfectly like ribbon candy. With the punch, loops can come out less perfectly aligned. I have customers who love the look of punched loops and others who don't because they only want the "ribbon candy" look. I am able to keep my loops from twisting by following these tips:
- Always learn to punch with yarn first. It ’s much easier to work with and will help you get the hang of punching before you move on to fabric strips.
- Make sure your stitches aren't too close together. If you are using monk's cloth and a #6 cut strip punch in every 2nd hole. When putting your rows side by side, space your next row 2 holes over. When using #8 cut strips punch in every 2nd hole but put your next row three holes over.
I ’m a beginning puncher and the front side of my rug is a complete mess! I hate it! There are long threads sticking out and I can ’t even see my design. I like the back side better! Help!
Don ’t panic! Take a deep breath! Because we work on the back side of our rugs (the wrong side) we don ’t have that much control as to what is happening on the front (the right side). It is common for loops to punch through other loops – splitting them and making them look uneven or pushing them out of place. Also, because we push all of our finished ends to the right side, the right side will be all hairy! After you punch you need to clean up the right side of your rug. Everyone does it – you haven ’t made a mistake at all! Here ’s how to clean up:
- Cut off all of those long ends so they ’re level with your loops. We call this “snipping.” When you do this, the cut ends will blend right in. Cut them off one at a time, don ’t cut clumps of them together or they will show.
- Clean up your lines and outlines. Take control of your rug! We call this “poking.” Do this with your closed scissors or another pointy tool (like an awl or the end of your punch needle). Poke your loops around and don ’t be afraid to really maneuver them into place. Push them into place until each loop is where you meant for it to be. This can take some time but is really worth the effort. A well-made rug should be beautiful on both sides. It is a good idea to “snip” and “poke” as you go. My book includes some before and after pictures. The results are dramatic.
Can I jump over other stitches when I ’m punching?
You can, but I wouldn ’t! It will weaken your rug. I got a rug to repair once and whoever made it had jumped hundreds of times. Most of these stitches pulled out and I had to re-punch all of them. For a wall hanging it would probably be OK to jump, but don ’t jump far!
How long does it take to make a hooked rug?
A fast puncher, using bulky weight rug yarn, can punch a square foot in approximately three hours. This doesn ’t count all the time it takes to figure out what colors to put where! I tend to spend a lot of time taking things out and re-punching until I ’m happy. Obviously, the more detailed and complicated the rug, the longer it will take. I haven ’t had a chance to time myself using a #14 fine. Everything I ’ve made has been kind of complicated and I think I ’ve spent more time pulling things out than putting them in! I did punch the 5.5” square to see how far one ounce of worsted weight rug yarn would go. It took me about 40 minutes to punch, but I was chatting with a friend, watching TV, and eating snacks at the same time…


